Register Your Weblog with Disqus

TL;DR Many of us have Disqus account to be able to place comments on those blogs which use Disqus comments widget for that. Because placing comments often requires being logged in. Of course, you can also log in with your Twitter or Facebook account. What is nice of Disqus optioin is that it keeps track of all your comments placed anywhere.
Sometimes however we want to add Disqus comments to our own blog and that requires another type of registration: that of our weblog itself. In this article, I share how this can be done. It may be helpful for those of you who got lost on the Disqus website searching for clues. 😃
Disqus Registration
- Register and account with Disqus if you don't have one yet.
- Log in to your account.
- If it is the first time you are logging in, you will immediately get to see the screen as in step no.8. Otherwise, proceed to step no.4.
- In the
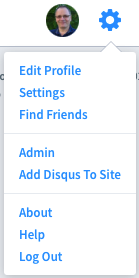
Adminsection create your organization (any name you like). - Click on your avatar and choose
Settings. You will now see the gear icon next to it. - Click on the gear icon and choose
Add Disqus to Site:
- Scroll to the bottom of the page till you see the GET STARTED button. Click on it.
- Now choose the
I want to install Disqus on my siteoption. - Fill in the form:
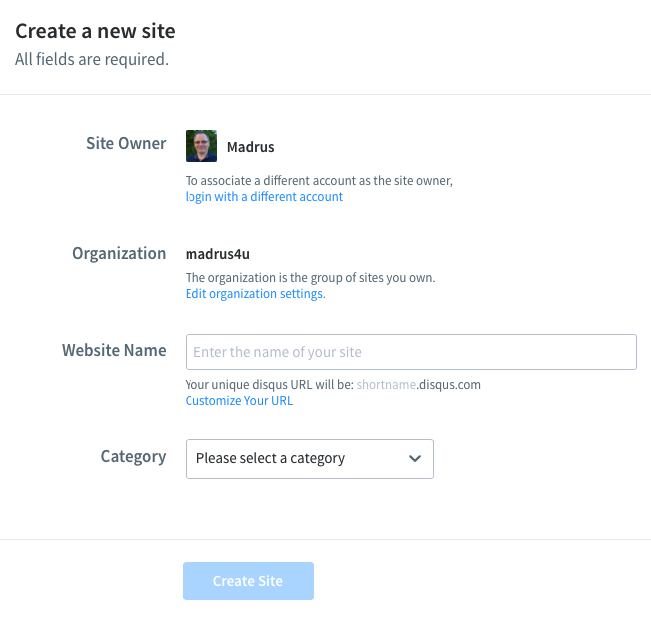
You may click the Customize Your URL link for more information on how to choose the Website Name.
- When you fill in all the fields, click the the Create Site button.
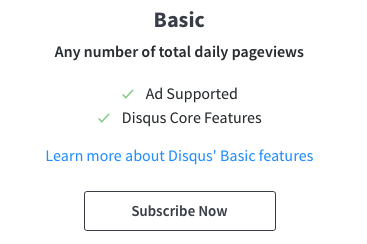
- On the next page your will be presented with the Disqus paid plans. Just scroll down to the free Basic plan and click on the Subscribe Now button:
- Now you will be presented with a big choice of platforms to install Disqus on. Docusaurus is not one of them, so choose

Ignore the next page.
- Click on the
Configure Disqusmenu option in the side menu on the left. This one is important. Here you have to specify your realWebsite URLto make sure that Disqus will collect the comments coming from that domain. Click the Next button. - Now, in
Setup Moderationchoose the default settings profile to moderate the comments of your visitors. Click the Complete Setup button.
You are done! Now, you will see the Disqus comments section under your blog posts. However...
Make sure you configure the special Comment & Moderation Settings section for your website!
Disqus Moderation Policies
In the Admin portal of your newly registered website, go to Moderation Settings:

Now, go through the Moderation Settings and make sure you checkmark the options you believe are important to have:
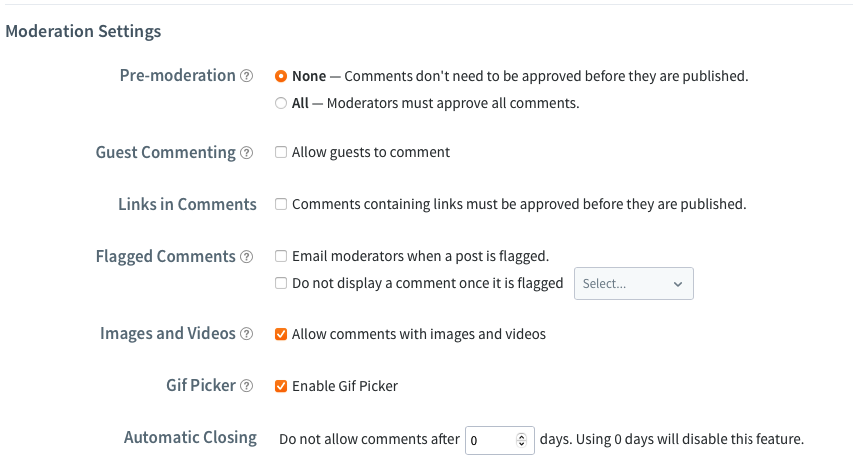
For me personally, the most difficult choice is that of Pre-moderation. Without it you may get spam comments published under your blog post. With it you may frighten away visitors who don't want to be censored. I would rather prefer a rule which requires any new visitor to have only his very first comment moderated and, if accepted, no more moderation for all their comments afterwards.